How to Make Product Attributes
When creating new products for your WordPress store, you need to know what product data you will be storing for customers who want to view these products. The attributes can cover a variety of technical aspects of a product. In this example, we will add attributes associated with a T-shirt.
Attributes we can add include Colour, Material, and Size.
When you create these attributes, a Slug is auto-created based on the attribute name. This will be useful later on.
You can enter values for these attributes by clicking on “Configure terms”. It is not essential to do this now, as you can also add to attribute values when creating products and filling in data.
Creating the product Category Tree
Creating a category tree in WooCommerce is simple. To start, go to the “Categories” page under “Products”. Start by creating your top-level categories for your store and products. In this example, we will start with the top category of “Clothing”. Next, create a new category and assign the “Clothing” category to the parent category. You can also create all the categories you need first, and assign parent categories later.
Names, descriptions and slugs:
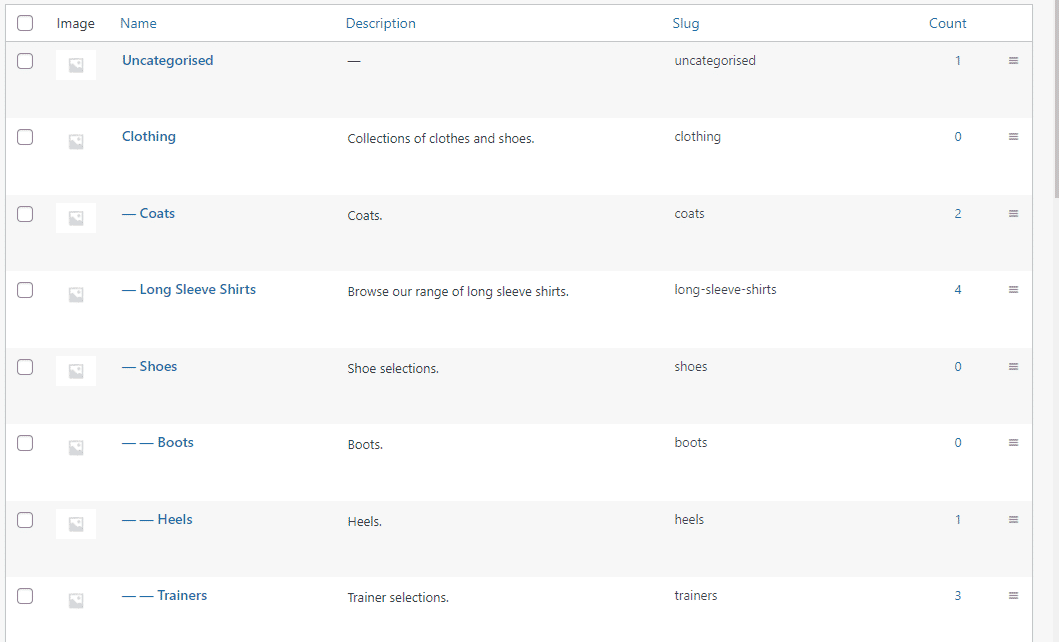
Product categories, including parent categories:
Once the categories have been created, you can view them in the product detail menu. You can also see them when creating a new product and assigning the product to a specific category.
Creating a New Product
To add a new product, you can either go to Products → All Products and then press “add new”, or go to Products → Add New. Once on this screen, you will have several fields you can fill in:
- Product name
- Product Description - Give a detailed description of your product here. It doesn't have to be long or overly technical.
- Product Image - This will be the main image associated with this product seen on the store and in the product list.
- Product Gallery - Where you will store any other images associated with this product.
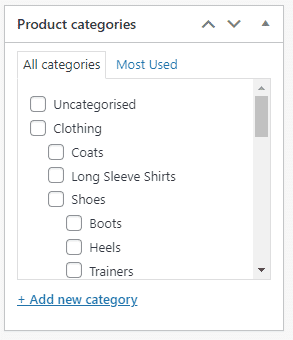
- Product Categories - This will show the category tree created earlier. Select which categories your product falls into here.
- Product Tags - ****Attach tags to your product to aid in filtering on the store view. You can create tags in the “Tags” menu under “Products”.
- Product Data - This section covers several options:
- Virtual / Downloadable - These determine if the product is tangible and if a file is sent to the customer when purchased.
- Regular/Sale Price - This sets the product's normal price and the price that is displayed when on sale.
- SKU - Stock Keeping Unit. This is an identifier unique to a specific product, and is used for managing your inventory.
- Manage Stock - This is used to have WooCommerce manage stock when a purchase has been made.
- Stock Status - If you run out of stock, the status should be set to “Out of Stock” ****or “On Backorder”.
- Sold Individually - This is a useful feature to activate on products with a limited inventory, and if you want customers to be able to buy only one per order.
- Weight - What the product weighs, needed for shipping purposes.
- Dimensions - Length, width and height of the product in cm.
- Attributes - This is where you add the attributes you created earlier and fill them with relevant data for the product. You can create attributes here but these attributes will only work locally for this product and not be globally available for other products.
When creating a new product, most or all of these fields will require filling with relevant data. They will also need proofreading to ensure no errors during input have been made. This can be tedious for most stores which often stock hundreds or thousands of products that need adding, updating and checking. One solution to this problem is using third party services to manage your product data.
Using OneTimePIM
OneTimePIM lets you store and edit all of your product data in one repository. Having your data in one, easy-to-access location makes it easy to ensure that the data is correct and up to date. The centralisation of your product data within OneTimePIM allows for easy exportation of data, which can be pushed through various connectors to different stores, maintaining accurate and up-to-date data on each platform.
Being able to push all of your products in WooCommerce at once is significantly less time-consuming than doing this task manually, and reduces the risk of human error.